How to Create a Group in the App
Small groups (or social groups) in the OnTrack Devos app are spaces managed by one or more Organizer(s) and/or Moderator(s) with group members that can interact within the group space. Groups have their own timelines and may have their own uploaded photos and documents. Members may post their devotional responses directly to group timelines for discussion, or they may post directly to the group timeline and respond to other timeline posts like in any social platform.
The ability to create small groups in the app is a feature of an Organizational Subscription. If you do not have access to the workflow below, you do not have a current Organizational Subscription.
Steps to create a group from within the OnTrack Devos app:

Step 1 | Access Group Page
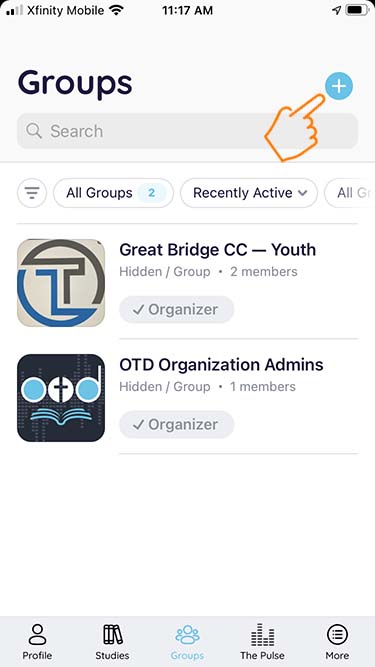
Browse to the Groups icon in the tab menu at the bottom of the app Profile screen.
Step 2 | Start a New Group
Tap the + button on the top right of the Groups screen.
Step 3 | Name the Group
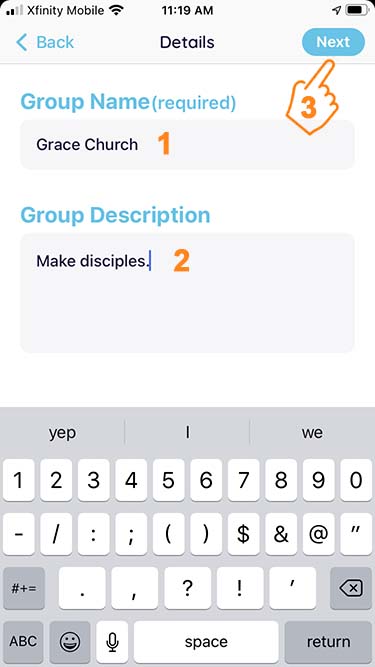
1 | Give the group an appropriate name.
2 | Give the group a short description, if desired.
3 | Tap the NEXT button on the top right of the screen.
Step 4 | Set Privacy Options
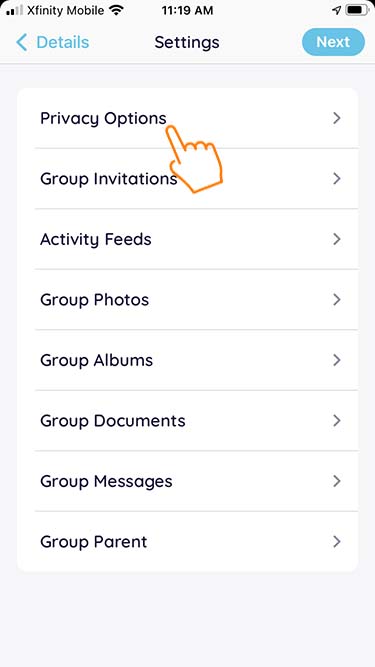
From the Settings screen tap to jump to the Privacy Options page.
Here you will set the group privacy relative to the entire OnTrack Devos app community. This setting will determine whether this group shows up as available to join in the general groups list for all users.
While there may be some organizational users that want to make one or more groups available beyond their organization, we strongly recommend that you start off with the Hidden setting. This will allow you to invite group members from your own community without managing users and/or requests from outside your target audience.
The Organizer can always change this setting later under the Manage tab.
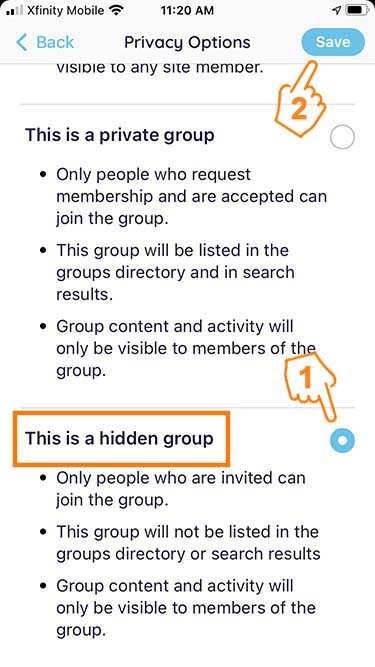
1 | Choose your Privacy Level from the three options presented.
In the screen shot here, you will see we’ve scrolled down to the third option and tapped the toggle to select “This is a hidden group”.
The bullet points under each option (public, private, hidden) describe how the setting will effect the group’s visibility and join-ability in the app. Pick the option that fits your strategy.
2 | Tap the Save button at the top right to lock in your setting. The app will return you to the Settings page.
Step 5 | Set Group Hierarchy (Optional)
The app has the ability to create parent/child relationships (think ministry departments) between groups. We recommend that you keep one primary group for your whole organization and organize the rest of your groups as “children” or subgroups of either primary group or of another existing subgroup.
For instance, your primary group might be your church name (let’s call it Grace Church) and your first layer of subgroups — with Grace Church as the parent — might be Men’s Ministry, Women’s Ministry, and Student Ministry. The Student Ministry group might be the parent to 9th Grade Boys, 9th Grade Girls, etc…
Think about your approach from a strategic standpoint as best you can. Again, you can change this setting for each group at any time under the Manage tab in each group.
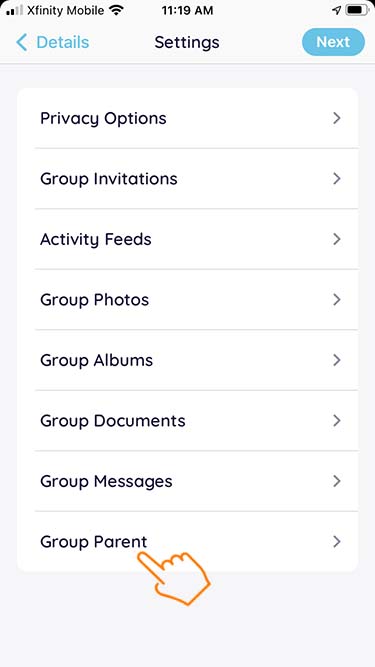
If this group will be a subgroup, tap the Group Parent option like you see in the image. If it’s a top-level (or your first) group, skip this and move to Step 6.
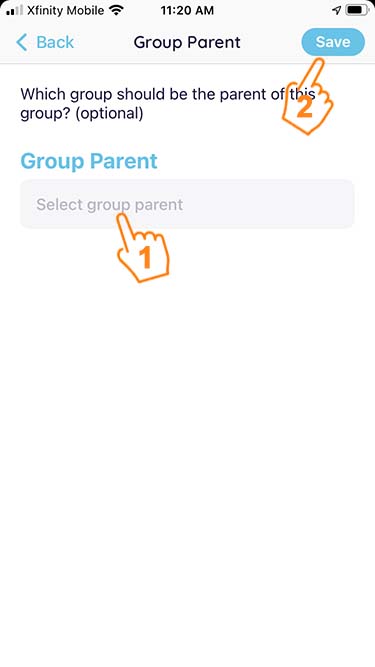
1 | Tap the field below the Group Parent heading to pop up a menu of all your existing groups. Select the appropriate group from the list.
2 | Tap the Save button on the top right. This will lock in your setting and return you to the Settings screen.
Step 6 | Other Permission Settings
The rest of the settings areas basically have three options to control who can do what with each element in your group space. The three options are:
- All Group Members
- Organizers & Moderators Only
- Moderators Only
You have the opportunity — and responsibility — to set permissions for the group based on your strategy and how you want the space used.
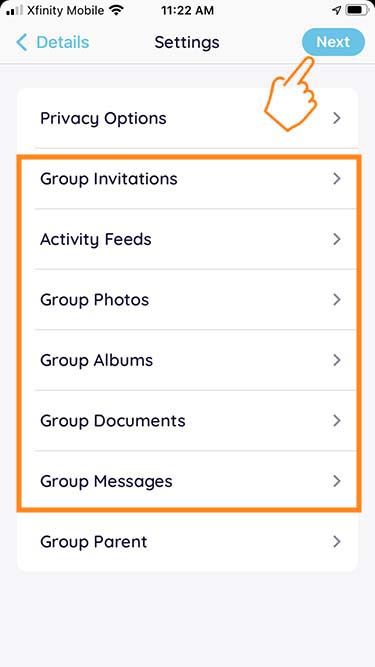
For most groups, it’s probably appropriate, for instance, to leave Activity Feed posting set to All Group Members. However, you may want to limit Document and/or Photo uploading to Organizers & Moderators only.
The Group Invitations feature allows searching the entire app user base for users to invite to join the group. If an invitation is accepted, that user automatically becomes a group member. You may or may not want to limit who in the group can extend those invitations.
Set appropriate permissions for each tab, then tap Next.
Step 7 | Add a Photo or Logo
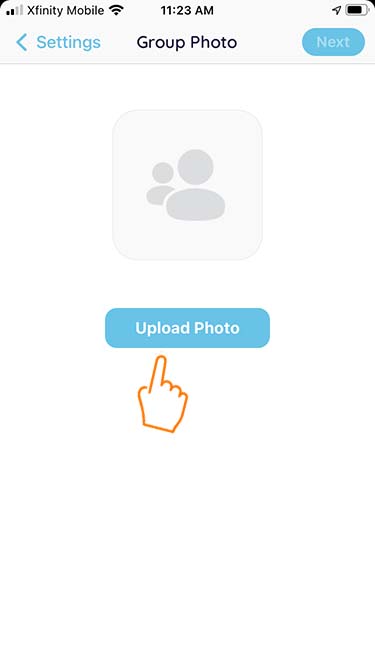
The image you add here will be placed in the app next to the group name on the various group pages. It’s like a profile photo for the group. You might want to use a logo or some other branded icon for quick visual ID, or you may use the same image for all of your groups. Your choice.
Tap the Upload Photo button to access source options for the image.
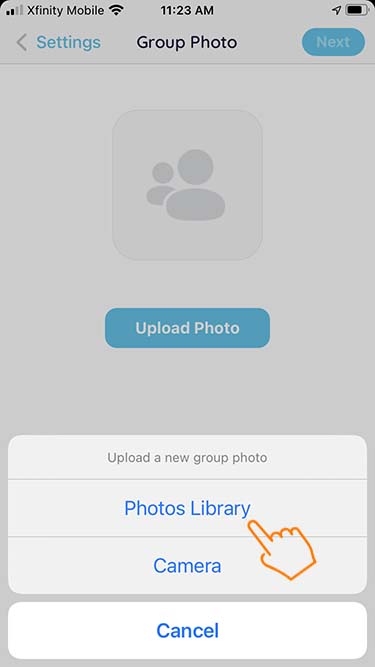
You will see some source options (Photos Library or Camera) to pick from. If you already have the image on your device, browse to it and select it. If not, you may have to hop out of the app and upload/add the image to your device.
You can also just use the camera, for now, to take a picture of your image on another device. If it’s not perfect, you can always update it later.
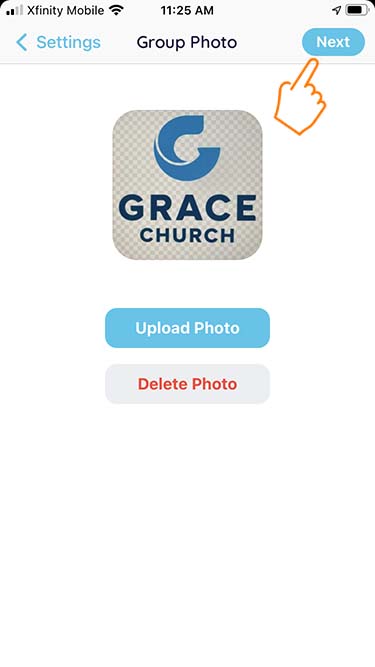
Note the logo image in this example was taken with an iPhone camera and cropped in the above step. It’s not perfect, but it’s a starting point.
Once you have the photo placed, tap the Next button on the top right of the screen.
Step 8 | Invite Members (Optional)
Once a group is entirely set up, there are two methods to invite members — by searching for existing members in the app or by emailing invites to members that may not already be in the app.
In the group setup, only the first option is available. If you know some/all intended group members already have OnTrack Devos app accounts, you can search and invite right here in the setup process.
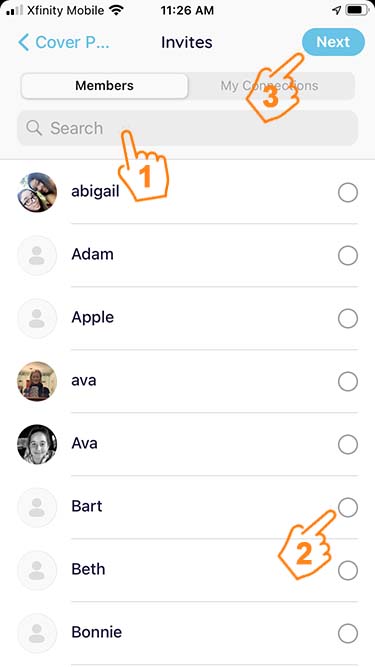
1 | Use the search box to find invitees. You can toggle the “My Connections” tab above to filter only accounts you are already connected to in the app.
*Pro Tip! One of the profile fields every user can complete is the Organization field. You may want to come up with a unique organization code name, code, etc… and ask your members to complete that field with that text string. This search box includes that field.
2 | Tap the circle next to each invitee to include them in the group invite. Each will receive an invite notification in the app. When they tap to accept, they will be added immediately to the group.
3 | Tap the Next button in the top right to send the invites and advance to the next step.
Step 9 | Enjoy Your Group!
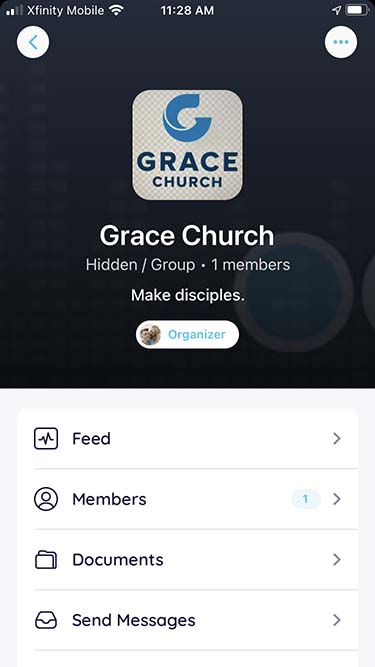
You should now be on the group Profile page. Browse around a bit and get familiar with it. You can update/change any settings from the Manage tab at the bottom.
Since you created the group, you are automatically designated at the Organizer, with full admin rights. Once other members join, you may upgrade one or more of them to Moderator or Organizer status to share responsibility and increase their permissions within the group in line with the settings you created.
Time to connect around the Bible!